Weekly Fashion Update~ New Tanks!

It’s true. The high-neck 90’s tank top is back and tearing up the runways. It is nearly impossible to log into Tumblr and not see hipsters and fashion icons wearing these cute tanks. My favorite stores to buy these are Forever 21, Pac Sun, and Urban Outfitters. These tanks can become a fashion mishap with specific pieces, but with these steps can make your outfit one to remember. Let’s begin!

Peace Love Shea

These tanks add great dimension when being worn as a basic. This outfit works well because the heavy prints and statement jewels balance out with the plain black tank. It doesn’t look basic because of the high neckline of the top. These tanks are typically crop tops so the high-waisted pants work well so you aren’t showing a drastic amount of skin.

39960.3.zoom

Although this isn’t a tank top, it still has the high neckline that this style provides. This dress flows out into a pleated circle skirt and is a gorgeous pastel color. Adding statement jewelry or colored accessories will make the outfit more dramatic. This dress is perfect for a regular day or can be paired with a printed blazer for work. It is $68 at nastygal.com

45629.3.zoom

This tank top takes a more peplum twist creating a great night-out look. Paired with leather pants and killer pumps, this peplum tank really strikes a chord. Having a heavy print works well with the neutral accessories. Wearing your hair up also draws attention to how this tank flatters your upper body. 

karla

I love this final look! The oversized skirt paired with the cropped tank and simplistic heels works fabulously! The minimal amount of jewelry and basic colors balances out the mid-drift. I love how simple this outfit is, yet it is so stunning. 

Ipsy June 2014

Yay! My first Ipsy bag has arrived!! For those of you who don’t know, Ipsy is a $10/month beauty bag that includes samples and full-sized products. I was on a wait-list for about 3-4 weeks until I was sent an email saying my first bag would arrive the middle of June. It was delivered in gorgeous pink shipping material and opened up to this lovely bag. The bag itself probably costs $10, and the beauty products are amazing. The theme is all about summer and the products seem to all correlate to create one main look. Overall, I was really impressed with my first bag and plan to use all of the products included. Let’s begin!

June Ipsy Bag www.lustforlipgloss.com

The first product is Nicka K New York Shimmer Eyeliner in Blue. This is a full-size liquid liner that is super shimmery. The bright teal color adds a nice pop for a winged look. I applied this and it went on fairly smooth. One thing that did catch my eye was even though it doesn’t say it is waterproof, it sort of is. I wore this liner for about an hour then tried to take it off, but after scrubbing with a makeup wipe it was still somewhat on my lids. This is good for beach or pool wear because it won’t glide off after jumping in.

June Ipsy Bag www.lustforlipgloss.com

Next is NYX Butter Gloss in Éclair. This is a full-size gloss that is the most creamy gloss of the century! It is a bit thick so be mindful when building up. The color is a lovely nude/baby pink and works great with all skin tones. If you were wanting to stick with a waterproof theme, like with the eyeliner, I wouldn’t recommend this, but would rather go for a lipstain. Still, this is a great product!

June Ipsy Bag www.lustforlipgloss.com

Carol’s Daughter Sacred Tiare Anti-Breakage & Anti-Frizz Styling Cream is the only hair product of the bag. This sample-sized product is used for blow-drying or flat ironing in order to prevent breakage. It smells like fresh flowers and has a medium consistency. I haven’t heard of this product before, but am excited to try it out.
June Ipsy Bag www.lustforlipgloss.com
Ofra Universal Eyebrow Pencil is next and is a light-brown matte color. This pencil is supposed to match all skin tones, hence “universal”, and is a waxy texture in order to keep hairs in their place. The pencil is full-size and isn’t retractable.
June Ipsy Bag www.lustforlipgloss.com
The final product is Realtree for Her Eau de Parfum. At first when I smelled this sample-size perfume, I was a bit turned off. It has a strong floral scent, but fades into a sweet smell. My go-to perfume is Daisy by Marc Jacobs, and so I typically go more towards the crisp scents. This product may get used, or it may not. I will test it by wearing a full, busy day and then decide it’s true fate.

Met Gala Extraordinaire!

Guess whose back and just in time for the Met Gala fashion recap? Haha, yours truly! The Met Gala is hosted by the infamous Anna Wintour, the Vogue editor-in-chief. Fun fact: Did you know it costs $25,000 just to attend the Met Gala?! This event is known as the fashion exhibit of the year. I have critically reviewed the best of the best. There was a TON of favorites, but these were the ones that really stuck with me. Let’s begin!

Naomi Watts in Givenchy

Naomi Watts in Givenchy. I love love this ombre and the light smokey makeup makes the focus on this gorgeous dress. This sheer paneling of the dress was found a lot at the Met Gala, but she took the cake!

"Charles James: Beyond Fashion" Costume Institute Gala - Arrivals

Emma Stone in Thakoon looks flawless. This was one of my favorite crop top combos on the red carpet. The two pink tones keep it youthful, as she is, the small side-boob cleavage and high slit keeps it sexy, and the gown keeps it formal. I do wish that she just put some earrings on or a statement jewel to emphasize the look just a bit more.

Dita Von Teese, Zac Posen

Dita Von Teese in Zac Posen is a show-stopper! The red accents of the dress are just enough that she doesn’t blend into the carpet like some others who wore all red. The hair is glamorous along with the perfect mermaid fit for her body.

"Charles James: Beyond Fashion" Costume Institute Gala - Arrivals

Blake Lively truly displays Met Gala class in this look. This shimmery gown is glowing off her body. The cape looks nice with the gown, but I feel like it takes away from the train on the dress and just hangs there. With her man as her best accessory, Blake was one of my all-time favorites.

Suki Waterhouse in Burberry

Suki Waterhouse in Burberry pulls this look off flawlessly. Nude and black & white were the most popular colors of the night. The hem is perfect and the subtle jewelry is a great compliment. That deep red lip truly brings everything together. She did this justice because if this gown was any form of white, it would look like a weird wedding dress.


Karolina Kurkova in Marchesa

Annnnnddddd the best of the best goes to….. Karolina Kurkova in Marchesa. This dress doesn’t even look real; it looks like artwork! Her model stature and posture really holds the dress up well. I feel like she would be the only one who could pull this gown off and make it a homerun. Simple diamond jewelry, light makeup,  a black petticoat underneath makes this the outfit of the night.

Product Battles: Clarisonic Mia vs. Olay Pro X

For this product battle I will be reviewing the Olay Pro X and the Clarisonic Mia brush. These brushes are the top exfoliators on the market and the question what millions are asking is “which one is best?” Should you spend over $100 on the Clarisonic or about $30 on the Olay? That is what we shall find out today. Let’s begin!

The Olay Pro X is $29.99 and comes in either the regular brush or microdermabrasion. I chose the regular and it came with one brush, 2 batteries, and a cleanser. The cleanser is very nourishing, but I prefer to stick to my everyday cleanser because it has been matched with my exact skin type. It doesn’t have a charger and runs on batteries. When turned on, it has two speeds and the brush moves in a clockwise motion. I would use this 2-3 times a week since I already use a manual brush when washing my face. After using it, I didn’t notice any purging of my skin and my makeup went on a lot easier. I wouldn’t necessarily say my blemishes cleared completely up, but I did notice smaller pores and less blackheads.

Next is the Clarisonic Mia in Pink. This product costs about $125.00 and comes in many colors. It came with a gentle cleanser which was “eh” like the Olay Pro X cleanser. This brush has to be completely charged before usage and the charger is included. I was reluctant to try this because of the horrible purging I have heard of from other reviewers. After a week or so of usage, I wouldn’t recommend this to my worst enemy! Maybe it was my skin, but my skin purged terribly. The intense bristles and motion of the brush caused cystic purging and I noticed small broken capillaries on my face. Since I haven’t fake tanned for awhile my skin is very light and the broken capillaries were very noticeable. I stopped using the Mia and went back to my manual brush to clear it up.

Annnddd the winner is… Olay Pro X! Obviously! This brush, in my opinion, really did what it was supposed to do and made my skin very soft. I have heard that a lot of people adore the Mia and so perhaps it was my skin that caused the outbreak. The price also was a deciding factor because the brushes are so similar, but nearly had a $100 difference. The Olay Pro X is well worth the money.

Ulta 14 Piece Gift Review!

Displaying photo.JPG

Ulta is offering a free gift of this completely filled makeup bag with a purchase of $19.50 or more of Ulta beauty products. I bought a Kabuki brush to replace my broken powder brush and a liquid liner pen that equated $19.99. Getting right on the $19.50 mark takes talent, but I tried as hard as I could to get the bargain. Within 5 days my package came and included this makeup bag that was filled with 14 makeup items. The bag was avilable in a turquoise-blue and hot pink. I would assume the products in both bags would be the same colors, but this bag had more neutral-pink toned colors. Let’s begin!
Displaying photo.JPG

First off, it comes with 3 quads of eyeshadow. The quad on the left is called Chic and contains 4 shimmer colors. The middle one is named Dramatic with 3 shimmer and one matte grey color. The last one is named Classic and is broken! I used this shimmery quad once and tried to put the complicated packaging back together and now the top won’t come off. The color pay off is pretty potent, but I was expecting more mattes just because I feel like they’re cheaper to just put into a quad.

Displaying photo.JPG

Next are cosmetic brushes! I was really happy that Ulta counted this set of brushes as one product from the 14 piece kit and not individual. The first brush on the left is an eyeshadow brush and is great for blending out the crease. The middle brush says sponge tip brush and I always get these brushes, yet never use them. Every now and again I will use it to get large amounts of a cheap shadow out. I know it can be used to make ombre nail designs as well. The blush brush on the far right is pretty good, somewhat small compared to my typical blush brush. It does apply a lot of product at once!

Displaying photo.JPG

This teeny tiny nail polish is the next product in the bag. It is in the color Fuchsiamania and the color basin is about the size of a quarter. The color matches the bag, going along with the pink theme. It has decent nail coverage; not as amazing as an Essie or O-P-I. It takes two coats to have full coverage and is a shiny solution.

Displaying photo.JPG

This blush is crazy sparkly and is named Sweet Cheeks. The color is fairly sheen except for the sparkle. If you apply enough it has a peach tint. I found that it went on better with the supplied blush brush as opposed to one of my fluffy brushes. The color payoff doesn’t really excite me, but I might combine it with some other brushes to add more shimmer.

Displaying photo.JPG

Next is the Voluptuous Volume mascara in Jet Black. I really love this mascara! This is probably one of my favorite products from the bunch. The mascara pieces out your eye lashes and fans them out. It builds up easily and doesn’t smudge off the lower lashes. Smudging is always a big no-no for me because my lower lashes have a tendency of rubbing off onto my under eyes with bad mascara.

Displaying photo.JPG

When I saw there was eyeliner included, I was overjoyed because I ran out of my everyday liner. I typically stick with retractable liners because they smudge easier and don’t have to be sharpened. This pencils are pretty good, though. One side is black and the other is deep brown.

Displaying photo.JPG

The next product is Super Shiny Lip Gloss in Illusion. This lip gloss matches the blush which matches the lip butter included. I never was a huge fan of lip gloss because of bad sticky experiences, but this one is not a super sticky consistency. It doesn’t have a smell and is a little shimmery.

Displaying photo.JPG

This product was another one where it is smaller than it should be. It kinda feels like it is half full… Nevertheless, it is a decent primer and helps my makeup go on easier. It reminds me of my Neutrogena Shine Control Primer and has nearly the same packaging. It only has enough primer for a month of faces, maybe.

Displaying photo.JPG

The final product is the Super Shiny Lip Butter in Vienna and I previously wrote about this in my last post.  I ADORE this lip butter so much! It doesn’t dry me out, has a light pink/nude with gold flecked color, and is so creamy. I will definitely keep Ulta lip butters in mind when searching for a new lipstick. This lip butter is easy to just slip on any day and works every time.

Displaying photo.JPG

Overall, these products are fairly decent. If you are new to makeup or have a minimal collection, I would say get this because all the products are supposed to work together and create one main look. If you are experienced and have a large collection of makeup, I would have to say skip it. Unless you need something worth $19.50 from Ulta, I wouldn’t intentionally buy this. The products are good and some are great, but I just feel like it is a collection that half of it might not even get used that often…

DIY~ Nail Polish Made From Old Eyeshadows!

If I had a dollar for how many times I bought an eyeshadow and never used it…. Well now I can! I found this trick in a magazine and absolutely had to try it out. All you will need for this D.I.Y. is one concealable bag, one eyeshadow (preferably a pigment), scissors, clear nail polish, a paint brush or old concealer brush, and a container for your masterpiece. This nail polish comes out matte on your nails, but adding a clear top coat will give it that original shine. Let’s begin!

First, put your eyeshadow in a bag. If you want a certain color out of a palette, with strong force and some good tweezers you can peel the glue off of the compact and remove the specific shadow. Palettes don’t work too well because most colors will just blend into a brown or deep grey and be a waste of makeup and time. The more shimmery, the more shimmery nail polish. A swirled eyeshadow, such as Mac Heavenly Creatures Mineralized Eyeshadows, will create a tie-dye effect.

Crush the eyeshadow up in your bag. It is important to use a concealable bag, such as a Ziploc bag, so you don’t spill tiny eyeshadow flakes all over your floor. Try to crush as much of the shadow out of the compact tin. Be careful not to puncture the bag when crushing.

You want the shadow to be in pigment form. Mineral loose shadows are easier to crush up because they are already all crushed up. Try to go for a powdery consistency because it mixes better with the clear nail polish.

Cut off a small corner and pour it into a container. These small containers can be found at the Dollar Store or most makeup stores. Try to fill the container up with the pigment up until the cap screws down to. To clarify, don’t fill it all the way to the tippy top.

Grab your clear nail polish and begin to pour it into the container. It is best to fill it up halfway, mix it, then add more. The less you fill with clear nail polish, the less solution you will have and the grainier it will be from the eyeshadow.

Mix well with either old makeup brush or a cheap paintbrush. Paint it on your fingers and you are done! If you don’t like constantly be getting a brush out to use your nail polish, then simply pour the eyeshadow powder into the clear nail polish container and shake it up!


My Top Lipsticks, Lipstains & Balms!

Displaying photo.JPG

My go-to lip looks lately (say that 10x fast) have included lipsticks, balms, and stains that are long lasting and are worth the money. Below is my top 6 lip products that I have been using daily and adore! All except one or two, the Lancome or the Ulta, are available at drugstores. I included Baby Lips Moisturizer in my top picture because this lip balm is perfect to go under any lipstick, whether it is matte or shimmer. Let’s begin!

Displaying photo.JPG

First is my absolute favorite matte: Revlon Colorburst Matte Balm in the color Standout. These are fairly new and cost $6.49. I was surprised that this line only consisted of warm colors (oranges, reds, occasional yellows) and not many pinks or nudes. This was the last red color in stock at the drugstore and I scooped it up! I love the matte because it off-sets a shimmery eye look perfectly.

Displaying photo.JPG

Next is the NYX Color Lip Balm in the shade Thank You. If you go to Ulta, make sure to hit up their clearance section because they typically have buckets full of these. Mine was about $1.99 due to being on clearance. This product is in a Chapstick-like packaging so you will have to be careful when applying dark colors. When you put this on it literally feels like buttah! The mix has little beads that moisturize your lips and don’t dry them out.

Displaying photo.JPG

This product is the Lancome Color Design in the color Sugared Maple. I actually got this as a present, but it generally costs $22.50. The color is a deep pink-brown mix that is a bit waxy at times. A waxy formula helps the lipstick dry on your lips and stick all day. Lancome is the most luxury my selection gets, but this lipstick is definitely worth it.

Displaying photo.JPG

Next, is a new product to my collection! This is the Ulta Super Shiny Lip Butter in the shade Vienna. I received this as a free gift from purchasing something over $19.50 at Ulta. I believe this promo is still in effect and you receive a 14 piece gift that is pretty much a completely filled makeup bag. I will be hopefully posting my haul review for that soon. This lip butter was included and is a beautiful shimmery light pink with flecks of gold when it hits the light. It costs about $8.00.

Displaying photo.JPG

The last two are lipstains. The first stain is the Revlon Just Bitten Kissable Balm Stain in the color Crush. It costs $5.99. I bought this in Fall when the deep berry lips were the trendiest looks going. I still use it to this day even though it is 80 degrees outside. This is a balm stain so it isn’t matte like the first one. I really like Revlon’s lipstain collections because even though they are stains, they are still very moisturizing.

Displaying photo.JPG

The final product is the Revlon Just Bitten Kissable Balm Stain in the color Honey. This balm stain is the same brand as the one prior, but is in this gorgeous light pink color. Honey costs $5.99 as well. For some reason, Honey always seems more shimmery than Crush, even though they are the same formula. I really love this color. It is light and perfect for everyday wear.

The Fake Bake is Real~ First Experience with VersaSpa & Tips for Spray Tanning!

Hello all you beauties! Sorry for the lack of posting lately, but I have had a jam-packed schedule since the first day of 2014! Yesterday I experienced my first VersaSpa spray tan and it was quite eventful. Typically, I just get airbrushed every now and again to shield my ghostly skin, but I decided to switch it up and get sprayed in the booth. I read all about Mystic Tan and VersaSpa. The overall consensus was that Mystic Tan left you a deep orange color, while VersaSpa was a light brown-ish tint. I chose VersaSpa and headed to my nearest Zoom Tan. And yes, pictures are included.

I made sure to do my research of what to do before getting sprayed by the booth and was well prepared. The day before I shaved everything that was going to come in contact with the spray. You want to shave before so that the tan will stick to your skin and not shave bumps or thick hairs.

The day of the spray tan I showered and exfoliated like an animal with St. Ives Apricot Scrub. Exfoliating is the best way to make sure you don’t come out streaky. I spent a good 45 minutes exfoliating all of my skin, including my face. Afterwards, I (secretely) applied a little bit of lotion to my dry areas. Typically, you aren’t supposed to do this, but I didn’t want spray tan build-up in those dry crevices. When getting spray tanned, you should wear dark, loose clothing. I just wore an old black school shirt, black Soffee cotton shorts, and flip-flops. Make sure you bring a towel for your car! I, thankfully, packed 2 shirts on accident so got to sit on one while driving home.

When I arrived the very tan instructor showed me how this works. Compared to everything I already googled, she was literally giving me the basics. I printed out the Zoom Tan trial spray tan which is just $5 for any shade. Additionally, I purchased a $5 primer that sprays you before the tan and lotion to upkeep it. Altogether, my spray tan was about $20. I chose the lightest color because my skin was literally printer-paper white and I didn’t know what was going to come out of that machine.

The time had come. I walked back with the girl and the told me the 4 poses, 6 including the primer poses, that I had to do. She left, I got changed, and started applying barrier cream to my feet and hands. Barrier cream is a lotion that they supply that is supposed to prevent your hands and feet from going bright orange. From my research, I knew to really lather that lotion up well. I, very carefully, stepped into the machine and looked at the diagram of positions. The worker lady told me to put my hand over the sensor to start the machine, but I had so much barrier cream on that it wouldn’t turn on! So I had to wipe some off using my hair net and finally it begun. The primer began and it was just a clear coating that covers your body as you face front and back. Next, color time. The poses for this were stand front, running man facing left then right, and then finally back. Afterwards it would dry you off. The spray wasn’t cold because they had a huge heater that heated up your body. The only problem was the spraying of the machine was so loud I couldn’t hear what the machine was saying. Make sure you practice before!!

get-attachment

Since I had chosen that the tan goes on clear then develops in 4-8 hours, the tan wasn’t evident when I got out. By hour 5 it was definitely noticeable. I waited until hour 6 to take my shower because by then I could see some mishap areas. Overall, the color and coating is pretty even. The main dilemma is on my hands. I put too much barrier cream on because I really didn’t want orange hands that I now have a spray tan line and it looks like I am wearing gloves! This is so embarrassing, but thankfully my event isn’t until Wednesday night and I’ve read that lemon juice can blend out this line. Any suggestions? Overall the VersaSpa gave me a pretty decent all-over color for a reasonable price.

Weekly Fashion Update~ Thigh High Socks

Who knew that even your socks could make a fashion statement?! Thigh high socks are all the rage this winter and go great paired with a well-layered outfit for those cold months. Creating the perfect outfit to wear with thigh high socks takes talent because you can easily go from fashionista to street-walker with the wrong pair of socks. These tips will ensure that you rock these upcoming cold months in style. Let’s begin!

Layering thigh high socks with sheer tights underneath is perfect for winter! This subtle layering effect keeps you warm and doesn’t look too bulky. Knit socks will keep you the warmest and opt for thicker materials if you are wanting to stay warm. Layering two different color and length thigh highs will add dimensions to your thighs.

When choosing a color, go for neutrals or basic colors (black, grey, tan, etc.) These colors are very easy to pair with outfits, don’t make everything look too busy, and make your legs look slimmer. Patterned thigh high socks make your legs look wider due to the elaborate print. Thigh highs with intricate stitching, like fishnets, have a thin line between inappropriate and gorgeous. Keep the socks simple and the right length.

These socks are also great for coverage! If high-waisted shorts show too much skin for your taste, strap on an over-sized cardigan to cover the back and then thigh high socks to cover your legs. Thigh high socks should go up to a little higher than your knee. If you get a pair that goes too high, you might as well just wear full-length tights. If you wear a pair too short, the socks look more like men’s dress socks. Pairing thigh high socks with boots and booties are perfect for winter.

DIY~Matte Nails: 2 Ways!

Personally, I think that matte nails are so chic! Applying matte and glossy nail polish adds a creative contrast to just regular ol’ nail polish. This tutorial contains two versions to create these matte nails. The steps contain hardly any materials and are effective every time. Let’s begin!

Type one: Steam

image

All you will need is a bowl, boiling water, and any color nail polish. Paint your nails like you normally would with any type of nail polish. Using a base coat won’t alter the tutorial, but I just didn’t do it for the sake of the experiment.

image

Pouring the boiling water into a bowl might be challenging with wet nails. Instead, you could just hold your hand over the water-filled pan on the stove. Be careful not to get too close or you could get steam burns, or the hot water could hit your skin. Hold for about 30 seconds with the steam getting on your nails.

image

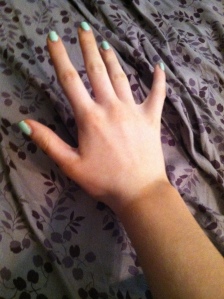
Excuse the quickie paint job, but your done! Altogether it took 1-2 minutes. Applying a top coat won’t be necessary or else it will add the shine back into the nails. Using a quality polish like O-P-I, Essie, or China Glaze will prevent chipping.

Type 2: Powder

image

You will need a powder (baby, corn starch, or baking powder, nail polish, and a brush. This brush can just be a regular powder brush that has been freshly cleaned. Paint your nails like regular.

image

While your nails are still wet, dust on the powder evenly onto each nail. Leave the powder on for about one minute.

image

While you are waiting, wipe the brush clean with a paper towel. Brush back over the nails after the minute is up and try to remove all of the powder. This may be difficult with the hand you don’t write with!

image

All done! The powder was a bit more difficult than the steam just because it is difficult to get off from the corners of your nails. Both were very effective, though. Apply a design with regular nail polish and your nails are going to look amazing!

Previous Older Entries

Enter your email address to follow this blog and receive notifications of new posts by email.

  • 151,438 beauties!